Battles of Saratoga
1777 · North America Medium
British Army — Continental Army · 10 turns · 47 units
Briefing
"This Army must not Retreat."
-- John Burgoyne, general orders before beginning the march south (June 1777, Crown Point)
Benedict Arnold held no command that day. He had quarrelled with Gates over the report of the battle at Freeman's Farm on 19 September and had been relieved of his post at headquarters on Bemis Heights. A little after two in the afternoon, when he heard firing from the woods to the north, he mounted his horse and rode out. Gates sent a messenger to call him back, but the messenger caught up with him only when it was all over.
At midday on 7 October, Burgoyne left his camp. His provisions were nearly exhausted, and no help was coming from the south. With 1,500 to 2,000 men and ten guns he went to see what lay beyond the American left: a reconnaissance. The men formed a line in Barber's wheatfield, and sat down while foragers cut the wheat. To the south, beyond the valley of Mill Creek, American outposts at Chatfield's Farm were watching.
The board begins at half past one in the afternoon, when the line in the wheatfield had been formed. To the north are the Balcarres Redoubt at Freeman's Farm and, beyond it, the Breymann Redoubt. Between the two stand two log cabins held by Canadians. Both redoubts face west and south, and their backs are open.
[Reading the victory line] The "margin" on screen is a single number seen from the British side: the points of the places the British hold, minus the points the Continentals hold, plus losses inflicted, minus losses suffered. This number is read on the final turn. The "victory line" is the even point of that number, and it is not zero. On this board the British begin far ahead in points for places, so things become even only when the Continentals have pushed that difference back. Above the line the British win; below it the Continentals win; the further from the line, the higher the grade of victory.
[How Burgoyne wins / how Gates wins] The margin opens at +55. The British hold the two redoubts and the wheatfield; the Continentals hold the two farms of Chatfield and Neilson. The victory line is +13. Even if they lose the wheatfield, the British stay above the line so long as they hold both redoubts and inflict as much loss as they suffer. The Continentals win by pushing the margin below the line. Taking the wheatfield alone leaves the difference in places at +15, still above the line. A little more is needed: wear down the reconnaissance force before it gets back to the redoubts, or lay hands on one of the redoubts.
[Counters that can move at once] The British: twelve of nineteen. The Continentals begin with thirteen of the twenty on the board; when Ten Broeck's militia arrive on T3 this rises to fifteen, and when Arnold comes onto the board on T4, to eighteen. The brigades of Paterson and Glover entering on T6 and T7 add counters but not moves. If the Continentals take the hex of the log cabins, labelled Canadian Cabins on the board, the British fall from twelve to nine. Time is on the Continentals' side. But the sun sets at six.
[Commanders] British: Burgoyne = Lieutenant General John Burgoyne (led the reconnaissance in person) / Phillips = Major General William Phillips / Riedesel = Major General Friedrich von Riedesel (Brunswick troops) / Fraser Brigadier = Brigadier Simon Fraser (shot by a rifleman that day; died the next morning) / LightInf Balcarres = Major Alexander Lindsay, Earl of Balcarres (light infantry; held the redoubt that bears his name) / Grenadiers Acland = Major John Dyke Acland (shot through both legs and captured) / 24th Foot Agnew = Major William Agnew / Brunswick Specht = Brigadier Johann Specht / R.Artillery Williams = Major Griffith Williams (lost his guns and was captured) / Hanau Pausch = Captain Georg Pausch (the guns of Hesse-Hanau) / Breymann Grenadiers = Lieutenant Colonel Heinrich von Breymann (killed in his own redoubt) / Marksmen Capt.Fraser = Captain Alexander Fraser (marksmen). Not a counter: Sir Francis Clerke (Burgoyne's aide; shot, and died at Gates's headquarters).
Continentals: Arnold = Major General Benedict Arnold (without command) / Morgan = Colonel Daniel Morgan (riflemen) / Riflemen Butler = Lieutenant Colonel Richard Butler / Dearborn = Major Henry Dearborn (light infantry; two years before, he had been at the stone wall on the beach at Bunker Hill) / Poor = Brigadier Enoch Poor / 1st NH Cilley = Colonel Joseph Cilley / 3rd NH Scammell = Colonel Alexander Scammell / 2nd NY VanCortlandt = Colonel Philip Van Cortlandt / 4th NY Livingston = Colonel Henry B. Livingston / CT Militia Cook and Latimer = Colonel Thaddeus Cook and Colonel Jonathan Latimer / Learned = Brigadier Ebenezer Learned / 2nd Mass Bailey = Colonel John Bailey / 8th Mass Brooks = Lieutenant Colonel John Brooks (the first regiment into the Breymann Redoubt) / 9th Mass Wesson = Colonel James Wesson / 1st Canada Livingston = Colonel James Livingston (a Continental regiment of Canadians) / NH Militia Drake and Evans = Colonel Abraham Drake and Colonel Stephen Evans / Ten Broeck = Brigadier Abraham Ten Broeck (Albany County militia) / Nixon = Brigadier John Nixon / Paterson = Brigadier John Paterson / Glover = Brigadier John Glover. Not counters: Major General Horatio Gates (never once left his headquarters), and Timothy Murphy (the man of Morgan's corps said to have shot Fraser; attributed).
[Decisions this board lets you test]
1. Stand in the wheatfield, or fall back to the redoubts at once? Burgoyne nearly lost his reconnaissance force within an hour. Is it worth leaving the redoubts' eighty points open for the wheatfield's twenty?
2. The front, or the western woods? Morgan's riflemen have a range of two, which reaches only across the open wheatfield. Go round through the woods to come out behind the British right, or cross the valley and push from the front?
3. Which redoubt do you aim for? The Balcarres Redoubt is three hundred metres of logs and earth, facing west and south. The Breymann Redoubt is a single breastwork, open at the back. Arnold first threw himself at the stronger one, and only after being repulsed turned to the weaker.
4. The log cabins. Take the one hex between the two redoubts and the British lose three moves. But that hex can be fired on from both redoubts.
[Outcome] The Breymann Redoubt fell at dusk. Brooks's regiment went in from the front and Morgan's men from the rear, and Breymann died inside the redoubt. Arnold rode between the cabins and came out behind the redoubt, where he and his horse were shot; his left leg was shattered beneath the fallen horse. It was the same leg in which he had been shot two years before, beneath the walls of Quebec. The Balcarres Redoubt held until night. Fraser died the next morning in the quarters of the Baroness Riedesel, and that evening, as he had wished, he was buried in the Great Redoubt. When the American gunners realised it was a funeral, they stopped firing. That night Burgoyne abandoned his camp, leaving the fires burning, and withdrew north. Ten days later, at the village of Saratoga, some six thousand men laid down their arms. When the news reached Paris, France concluded an alliance with America the following February. Three years later Arnold was discovered trying to sell West Point to the British, and became a British brigadier. Today, on the Saratoga battlefield, there is a monument that bears no name. All that is carved on it is a single booted leg.
The wheatfield was never finished.
Between the log cabins, one horseman rode through.
The same leg was shattered twice.
The monument carries only a boot, and no name.
The man who wrote "This Army must not Retreat"
retreated north that night, leaving his fires behind.
The battle at Freeman's Farm on 19 September is not on the board. The two redoubts were built after it, and folding both days into one board would put redoubts on the field that did not exist on the first day. The Great Redoubt by the Hudson and Hamilton's brigade, which did not move from it, are also off the board (adding them would shift only the denominator of the result). The riflemen's range of two replaces with a board rule the skill that let them pick off officers from further away than a musket could.
1 hex = 150 m, 1 turn = 30 minutes, 1 CS = about 50 men. T1 = 10/7 13:30, T2 = 14:00 (first shots in the wheatfield), T4 = 15:00 (Arnold comes onto the board), T6 = 16:00 (the reconnaissance force falls back to the redoubts), T8 = 17:00 (the assault on the Balcarres Redoubt), T10 = 18:00 (the Breymann Redoubt falls at dusk).
Maps
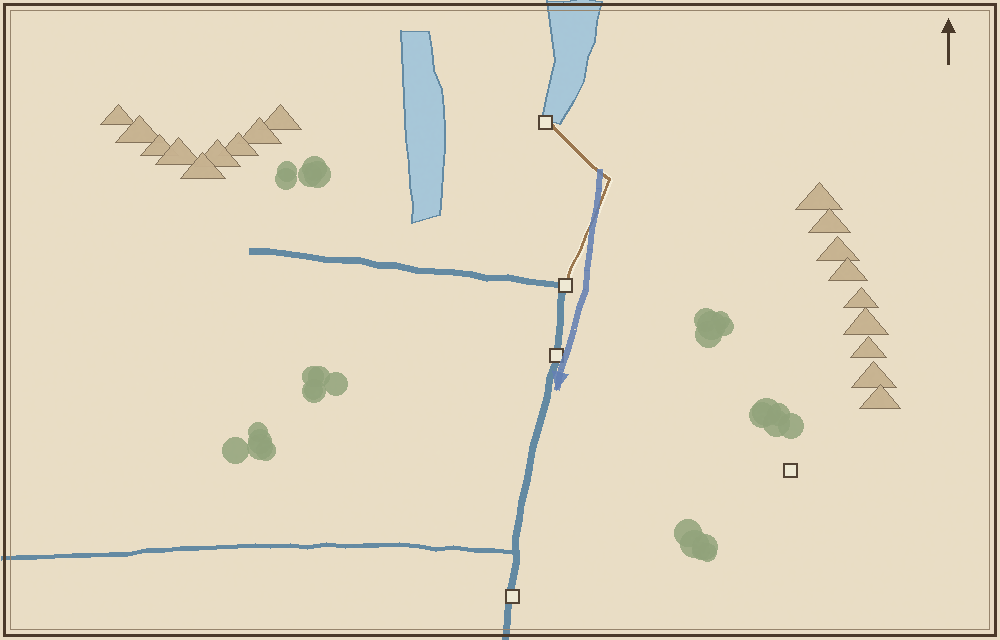 SARATOGA
Fort Ticonderoga
Fort Edward
Saratoga
Albany
Bennington
Lake Champlain
Lake George
Hudson R.
Mohawk R.
Burgoyne's advance
SARATOGA
Fort Ticonderoga
Fort Edward
Saratoga
Albany
Bennington
Lake Champlain
Lake George
Hudson R.
Mohawk R.
Burgoyne's advance
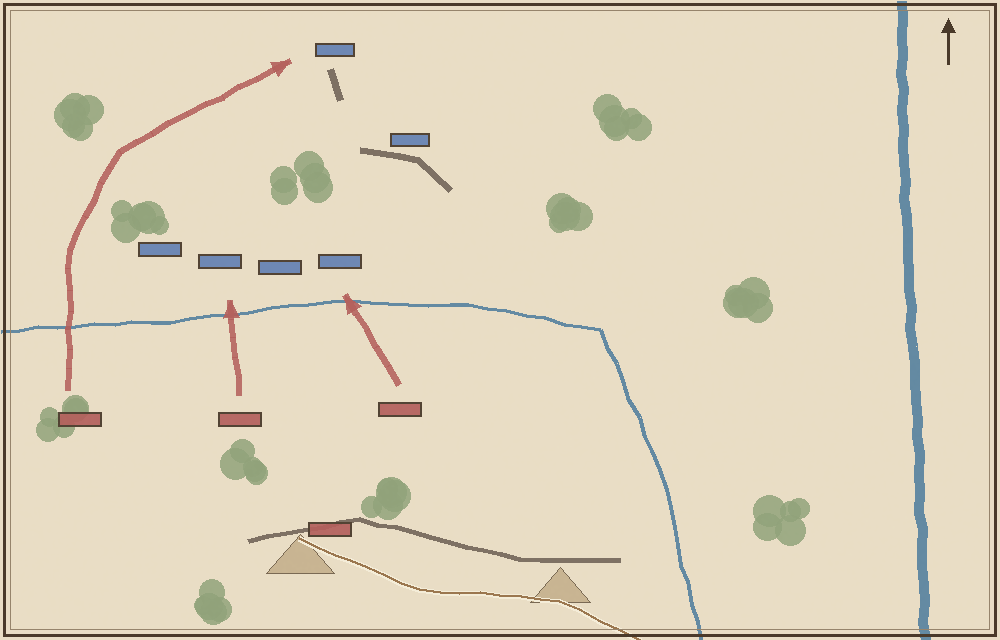 Balcarres Redoubt
Breymann Redoubt
Barber Wheatfield
Mill Creek
Chatfield Farm
Neilson Farm
Bemis Heights
Hudson R.
British camp
Morgan
Balcarres Redoubt
Breymann Redoubt
Barber Wheatfield
Mill Creek
Chatfield Farm
Neilson Farm
Bemis Heights
Hudson R.
British camp
Morgan