Battle of Königgrätz (Regimental)
1866 · Europe Long
Prussia — Austria and Saxony · 13 turns · 195 units
Briefing
"Bitte inständigst, um jeden Preis Frieden zu schließen. Katastrophe für die Armee unvermeidlich."
"I urgently beg Your Majesty to make peace at any price. Catastrophe for the army is unavoidable." -- Ludwig von Benedek, telegram to Emperor Franz Joseph, 1 July. The Emperor replied: "Peace is impossible. If unavoidable, I order a retreat. Has a battle already taken place?" The battle took place two days later.
The morning of 3 July was drizzly. The Prussian First Army came down to the villages along the Bistritz, Benatek, Sadowa and Dohalitz. East of the stream lay gently rolling fields, and where the fields rose slowly stood two villages, Chlum and Lipa. The guns of the Austrian Northern Army were emplaced there. Anyone who came down to the stream was being watched from above.
The First Army had not been ordered to break through that ridge from the front. It had been ordered to hold it. While it held, an army that had come by another road would appear on its right: that was the whole of Moltke's plan. Crown Prince Frederick's Second Army had been at Königinhof the night before and had been marching south since dawn. The northern edge of the board is that road.
But the plan cannot be seen on the board. All that can be seen is the Bistritz, and the fact that whoever crosses will be fired on from above. If the Second Army does not arrive in time, the First Army will be worn out in front of the ridge by midday.
[How to win] The result is decided by a single margin. Margin = (points of objectives you hold - points of objectives the enemy holds) + (losses inflicted - losses suffered). There are ten objectives on the board worth 205 points, and Austria holds 175 of them from the start. If the margin seen from the Prussian side ends above the victory line (+65 points), Prussia wins; below it, Austria wins. An objective counts twice, added to the side that takes it and subtracted from the side that loses it: Chlum alone moves the margin by 80. On this board there is hardly any road to victory that does not take Chlum. Finish 22 points beyond the line for a tactical victory, 180 for an operational victory, and 360 for a strategic victory. Short of 22, it is a draw.
[The way back] The Austrian army alone can leave the board by its eastern edge towards the Elbe and the fortress of Königgrätz. Each unit that gets away scores one point per point of combat strength, and the artillery reserve scores a further 20. On this side there is a way of winning that accepts defeat so long as the army is brought home. But the exit is only four hexes wide, and if it is closed, units trying to get away are counted as destroyed.
[Counters that can move at once] Prussia: twenty-nine. When the Second Army enters on turn 5 it gains fourteen, and on turn 8 six more, for forty-nine. Austria: thirty-nine, unchanged. But while it holds the Swiepwald in the woods (+6) and Cistowes to its west (+4), this rises to forty-nine. Only moves are gained, not points.
[Commanders] On each counter, the upper name is the division commander (Prussia) or brigade commander (Austria) and the lower is the regiment (IR = infantry regiment and its number). Prussian army: Fr.Karl = Prince Frederick Charles (First Army), Fransecky = Fransecky (7th Division; goes into the woods), Horn = Horn (8th Division), Werder = Werder (3rd Division), 4th Div = the 4th Division, Tuempling = Tümpling (5th Division), Manstein = Manstein (6th Division), Alvensleben = Alvensleben (1st Cavalry Division), Weyhern = Hann von Weyhern (2nd Cavalry Division). Herwarth = Herwarth von Bittenfeld (Army of the Elbe), Muenster = Münster-Meinhövel (14th Division), Canstein = Canstein (15th Division), Etzel = Etzel (16th Division). Kronprinz = Crown Prince Frederick William (Second Army), Pr.August = Prince August of Württemberg (Guard Corps), Hiller = Hiller von Gaertringen (1st Guard Division), Plonski = Plonski (2nd Guard Division), Bonin = Bonin (I Corps) with Grossmann and Clausewitz as his two divisions, Steinmetz = Steinmetz (V Corps) with Loewenfeld and Kirchbach, Mutius = Mutius (VI Corps) with Zastrow and Prondzynski.
Austrian and Saxon army: Benedek = Ludwig von Benedek (Northern Army). III Corps, Ernst = Archduke Ernst (Appiano; Col.Benedek = Colonel Benedek, not the commander-in-chief; Kirchsberg; Prochaska); X Corps, Gablenz = Gablenz (Mondel, Grivicic, Knebel, Wimpffen); IV Corps, Festetics = Festetics and Mollinary = Mollinary (Brandenstein, Fleischhacker, Poeckh, Ehz.Joseph = Archduke Joseph; Brandenstein and Poeckh are the brigades that plunged into the woods); II Corps, Thun = Thun-Hohenstein (Thom, Henriquez, Saffran, Wuerttemberg = Duke of Württemberg); VIII Corps, Leopold = Archduke Leopold (Fragnern, Kreyssern, Roth, Rothkirch); VI Corps, Ramming = Ramming (Waldstaetten, Hertwek, Rosenzweig, Jonak); I Corps, Clam-Gallas = Clam-Gallas (Poschacher, Leiningen, Piret, Ringelsheim). Albert = Crown Prince Albert of Saxony (Schimpff and Stieglitz = the two divisions, Fritsch = the cavalry). Holstein, Coudenhove and 2 Res Cav = the three reserve cavalry divisions, Edelsheim and Taxis = the two light cavalry divisions (the lower name is the brigade commander). Arty Res = the artillery reserve.
[Decisions this board lets you test] First: do you go into the woods? The Swiepwald gives you moves, but going in draws your right wing west. Historically, Festetics's corps plunged into the woods against orders, and the line from Horenowes to Nedelist grew thinner by as much. The woods mean moves, and the right wing must face north. You cannot have both.
Second: how far do you wear down the First Army? The Second Army enters on turn 5, and from there it is twenty-one hexes to Chlum. Push too early and you stall in front of the ridge; do not push, and Austria can turn its whole army to face north.
Third: how do you use the guns? The Austrian artillery reserve has rifled guns with one hex more range. But they are heavy: once an enemy is adjacent, they can neither fire nor fall back. The Prussian infantry carry the needle gun and are one step stronger in combat for the same numbers; it is not range but rate of fire that has turned into combat strength.
[Outcome] Soon after noon the Guard of the Second Army came out onto the lime-tree hill at Horenowes and turned south from there. Shortly after half past two, Chlum fell. Hiller von Gaertringen, who took the hill, fell on the spot. Benedek, told that his centre had been broken, galloped over and sent Ramming's corps into a counter-attack, but it was crushed in the village of Rosberitz. After that only the artillery reserve remained, still firing, while behind its gun line the Northern Army drew back to the Elbe. It lost 44,000 men, of whom 20,000 were prisoners.
The Seven Weeks' War ended that afternoon. Austria was put out of Germany, peace was made at Prague, and five years later France would face the same army at Versailles. Benedek was brought before a court-martial; by the Emperor's order he was forbidden to defend himself, and he lived silently in Graz for fifteen years until his death.
On a drizzly morning, they came down to the stream.
From the lime-tree hill, they turned south.
Only the guns remained, and let the army cross.
Forty-four thousand, and seven weeks.
Peace, at any price:
two days after that telegram.
The three days of manoeuvre before the armies faced each other, how Benedek chose the ridge the night before, and the cavalry fight at Stresetitz after three in the afternoon have been folded away. The crossing at Nechanitz lies off the board, and the Army of the Elbe begins at the south-western edge, already across. This edition is the super-heavy version: the same ground as the standard board (mKoniggratz1866), redrawn with smaller hexes and regimental counters. Prussian regiments are one counter each (the rifle battalions are folded into their divisions' regiments); Austrian brigades are split into their two regiments (the Feldjäger battalions are folded in); Saxon brigades are split in half; cavalry is one counter per brigade. V Corps is shown by brigades because the sources disagree on its regimental numbers.
1 hex = 250 m, 1 turn = 40 minutes, 1 CS = about 1,000 men. T1 = 3 July 08:00, T5 = 10:40 (the Second Army enters the board), T9 = 13:20, T11 = 14:40 (when Chlum historically fell), T13 = 16:00 (the Northern Army falls back to the Elbe).
Maps
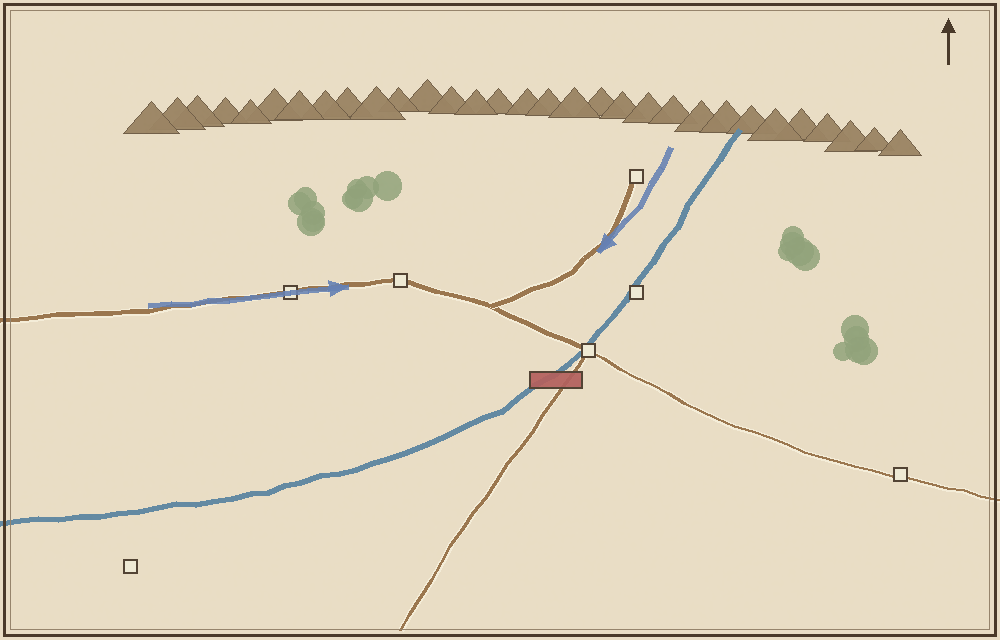 KONIGGRATZ (SADOWA)
Koniggratz
Josephstadt
Koniginhof
Horitz
Gitschin
Prague
Olmutz
First and Elbe Armies
Second Army
Austrian North Army
Elbe R.
Silesia (Prussia)
to Vienna
KONIGGRATZ (SADOWA)
Koniggratz
Josephstadt
Koniginhof
Horitz
Gitschin
Prague
Olmutz
First and Elbe Armies
Second Army
Austrian North Army
Elbe R.
Silesia (Prussia)
to Vienna
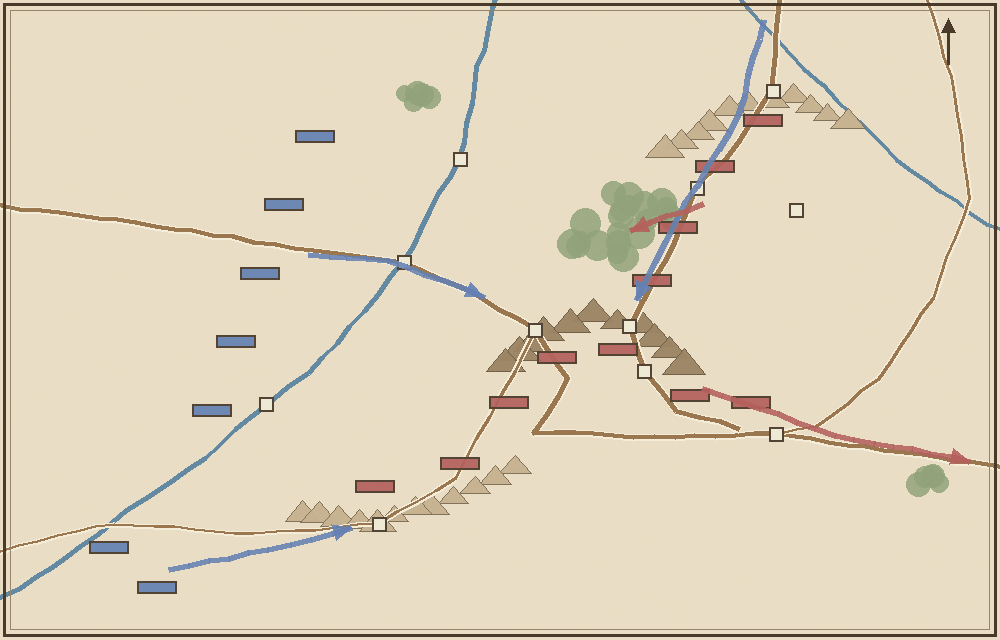 Chlum
Lipa
Sadowa
Horenowes
Maslowed
Swiepwald
Rosberitz
Problus
Benatek
Dohalitz
Sweti
Nedelist
Bistritz R.
Trotina R.
First Army
Elbe Army
Second Army
to Koniggratz
Chlum
Lipa
Sadowa
Horenowes
Maslowed
Swiepwald
Rosberitz
Problus
Benatek
Dohalitz
Sweti
Nedelist
Bistritz R.
Trotina R.
First Army
Elbe Army
Second Army
to Koniggratz