Second Battle of Fredericksburg
1863 · North America Medium
Union (VI Corps) — Confederate (Early's Division) · 12 turns · 41 units
Briefing
"...will attack and destroy any force he may fall in with on the road." -- Hooker's order to Sedgwick, night of 2 May 1863 (Official Records). At the entrance to that road stood the stone wall that the Union army had charged fourteen times five months before, without once reaching it.
Dawn on 3 May 1863, at Fredericksburg. Hooker's main army is fighting to the west at Chancellorsville. In the town remain Sedgwick's VI Corps and Gibbon's division, twenty-seven thousand men. Across the plain, at the foot of Marye's Heights, lie the sunken road and the stone wall; behind them stand only four Mississippi regiments under Barksdale and the Washington Artillery. The rest of Early's division faces Prospect Hill, six miles to the south, expecting the Union to come from that direction.
[How to win] The result is decided by a single margin. Margin = (points of objectives you hold - points of objectives the enemy holds) + (losses inflicted - losses suffered) + (exit points of your own units that leave the map). There are six objectives worth 100 points: Marye's Heights 30, Salem Church 25, Lee's Hill 15, Taylor's Hill 10, Banks Ford 10, the town of Fredericksburg 10. The Confederates start with 90 points, the Union with 10. Union units that leave by the Plank Road at the west edge (towards Chancellorsville), and Confederate units that leave by the south edge at the Telegraph Road or the four hexes west of it, score per point of combat strength one point for the Union (a breakthrough) and ten points for the Confederates (a retreat). Confederate exit points are capped at 35 in total. If the margin seen from the Union side ends above the victory line (+39 points), the Union wins; below it, the Confederates win. Finish 9 points beyond the line for a tactical victory, 70 for an operational victory, and 140 for a strategic victory. Short of 9, it is a draw.
[The stone wall] The two hexes of the sunken road and the stone wall are fortresses. Units inside need not attack, and when attacked they suffer no result other than elimination or the elimination of the attackers; everything else is a stalemate. The Confederate AI keeps the defenders of the wall inside the sunken road. The Union will be thrown back again and again until it has gathered enough strength.
[Three brigades facing south] The brigades of Gordon, Hoke and Smith of Early's division are on standby. They begin to wake little by little from turn 4 (10:00), and wake on the spot if attacked.
[Counters that can move at once] Union: six, with six more on turn 6 (noon); Sedgwick was cautious until the wall fell. Confederates: twelve, with four more on turn 10 (16:00).
[Reinforcements] Confederates: on turn 10 (16:00) Semmes and Kershaw, and on turn 11 (17:00) Wofford and Mahone, arrive from Chancellorsville at the west edge, beyond Salem Church. The Union receives none.
[Commanders] Union: Sedgwick = John Sedgwick (VI Corps). Johns = the column of Colonel Thomas Johns and Spear = the column of Colonel George Spear (7th Mass, 36th NY, 61st PA, 43rd NY); Burnham = Hiram Burnham's Light Division (6th Maine, 5th Wis, 31st NY); Shaler, Browne and Wheaton = Newton's division; Grant (Vermont Brigade) and Neill = Howe's division; Brown (New Jersey Brigade), Bartlett and Russell = Brooks's division; Sully, Owen (Philadelphia Brigade) and Hall = Gibbon's division; Hunt = the heavy guns on Stafford Heights (range 3). Confederates: Early = Jubal Early; Barksdale = William Barksdale's Mississippi brigade; Walton = the Washington Artillery; Cabell = the guns on Lee's Hill; Hays = Harry Hays's Louisiana brigade; Gordon, Hoke and Smith = Early's division; Wilcox = Cadmus Wilcox's Alabama brigade; Semmes, Kershaw and Wofford = McLaws's division; Mahone = William Mahone. The upper name on each counter is the commander, the lower the unit.
[The decisions this board asks] First (Union): strike the wall head-on again and again, or go round by Hazel Run against Lee's Hill. The wall is a fortress; half measures bring only stalemate or annihilation.
Second (Union): once through the wall, use the remaining time to march as far as Salem Church. Pass the church before McLaws arrives from the west, and the road to Chancellorsville lies open.
Third (Confederate): fight Early's division behind the wall, or fall back south down the Telegraph Road and keep the division intact. Troops that withdraw score points.
Fourth (Confederate): where on the Plank Road to stop Wilcox's five regiments. Give ground one hex at a time, and McLaws will be in time.
[Outcome] The third assault came at about eleven o'clock. Newton's two columns ran up Hanover Street and the Plank Road; Colonel Spear fell and the columns nearly broke, but together with Burnham's Light Division they went over the wall. Much of the 18th Mississippi and of the Washington Artillery was captured. The wall that had swallowed eight thousand lives the winter before fell in half an hour.
Early withdrew south along the Telegraph Road and kept his division intact, while Wilcox gave ground one hex at a time along the Plank Road and bought time. Sedgwick took several hours to begin moving west. At half past five, before the woods and the schoolhouse of Salem Church, the brigades of Wilcox and McLaws stopped Brooks's division. On 4 May Lee tried to surround Sedgwick from three sides, but the attack was delayed until evening, and that night Sedgwick withdrew across Banks Ford to the north bank. On the night of the 5th Hooker too crossed the river, and the battle of Chancellorsville was over.
The wall that fourteen charges never reached the winter before
was held now by four regiments alone
At the third attempt the columns crossed the sunken road
Before the church in the western woods, the day went down
The next night the pontoons carried them north
The board runs from 07:00 to 18:00 on 3 May. The encirclement of 4 May and Sedgwick's withdrawal appear only in the [Outcome]. Gibbon's failure to cross the canal is represented by the canal hexsides in the northern sector (the stretch in front of the wall is not drawn). In front of the wall each counter is a regiment; elsewhere, a brigade.
1 hex = 400 m, 1 turn = 1 hour, 1 CS = about 300 men. T1 = 3 May 07:00, T4 = 10:00 (Early's three brigades begin to wake), T5 = 11:00 (the third assault), T6 = noon, T10 = 16:00 (McLaws), T11 = 17:00 (Salem Church), T12 = 18:00.
Maps
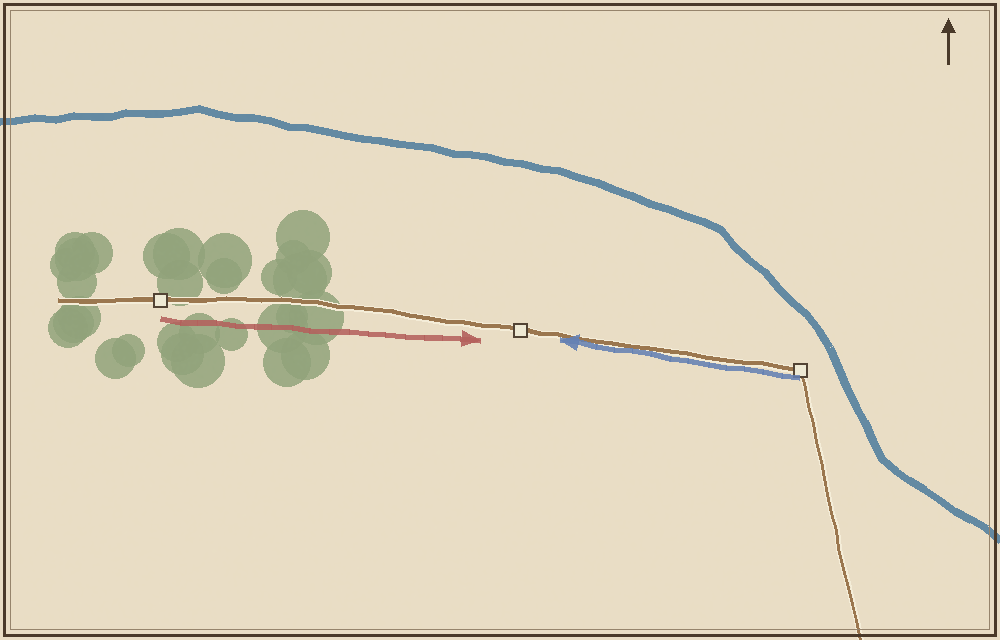 FREDERICKSBURG
Chancellorsville (Hooker)
Salem Church (17:30)
Rappahannock River
McLaws (back from Chancellorsville)
to Richmond
FREDERICKSBURG
Chancellorsville (Hooker)
Salem Church (17:30)
Rappahannock River
McLaws (back from Chancellorsville)
to Richmond
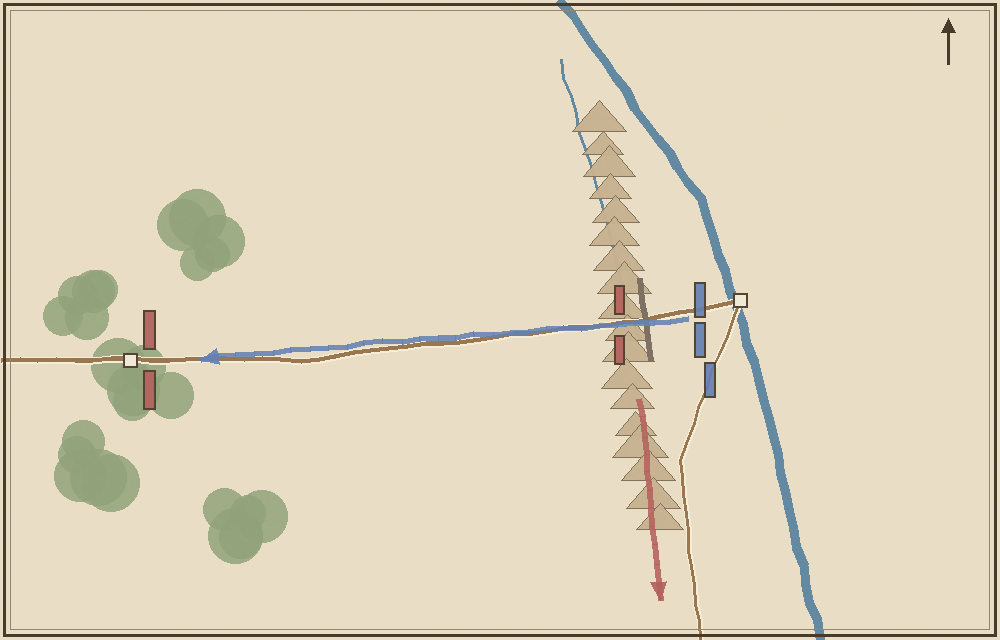 Marye's Heights stone wall (carried at the third attempt)
Salem Church (17:30)
Wilcox (falling back step by step)
Early (south down the Telegraph Road)
Sedgwick (27,000)
Gibbon (canal bridges taken up)
McLaws (back from Chancellorsville)
Stafford Heights (Union guns)
Banks Ford (withdrawal, night of 4 May)
Marye's Heights stone wall (carried at the third attempt)
Salem Church (17:30)
Wilcox (falling back step by step)
Early (south down the Telegraph Road)
Sedgwick (27,000)
Gibbon (canal bridges taken up)
McLaws (back from Chancellorsville)
Stafford Heights (Union guns)
Banks Ford (withdrawal, night of 4 May)