Battle of Hastings
1066 · Europe Short
Normans — English · 9 turns · 39 units
Briefing
HIC HAROLD REX INTERFECTVS EST
"Here King Harold was killed"
-- the inscription on scene 57 of the Bayeux Tapestry. It was embroidered by the side that won
The wall does not break. If it breaks at all, it will be only when the wall comes down of its own accord. The nine hours of this board turn on that single line.
14 October 1066, the south coast of England. At the end of September, Harold Godwinson had only just defeated and killed the King of Norway north of York. Before that news had settled, William, Duke of Normandy, landed on the south coast. Harold marched south with no time to raise his forces again, and on the evening of the 13th he gathered his army at the "hoar apple tree" on Caldbec Hill. The next morning he went a kilometre south to a ridge and drew up his men there, shoulder to shoulder. There were no horsemen, and hardly any archers. Not to come down: that was their way of fighting. In the morning, on Telham Hill, William put on his armour and divided his army into three: the Bretons on the left, the Normans in the centre, and the French and Flemings on the right. Every division had archers in its front rank. Shoot, press with the foot, strike with the horse. Three times they did so, and three times the wall did not move.
[The Shield Wall] Along the ten hexes of the ridge (from Senlac Ridge through Harolds Standard to Santlache), a fence stands on the south-facing edges only. As long as an attack crosses those edges, the defender's combat strength is doubled. They do not face north, east or west. The wall is worth something only while it stands on the hill.
[How to win] The result is decided by a single margin. Margin = (points of objectives you hold - points of objectives the enemy holds) + (losses inflicted - losses suffered). The dividing line is Normans -45. The Normans win by bringing the margin to -36 or higher; the English win by holding the Norman margin to -54 or lower. Anything in between is a draw. A further 71 points beyond the line gives an operational victory, and 141 a strategic victory (for the English, -116 and -186). The objectives on the board are worth 100 points in all. The board opens at a margin of -67, because every objective on the hill belongs to the English (the Standard 35, the eastern and western ends of the ridge 16 each, Caldbec Hill 10; the Normans hold only Telham Hill, 10). Without touching the ridge, the Normans can pick up only Malfosse, 6, and Asten Brook, 7, 13 in all: objectives alone bring them to -54, not even a draw. There is no way but to break through on the hill. For the English, it is enough not to be pushed back: to stand on the hill, and for the king to stand. The moment the Harol King piece is eliminated, the English lose, regardless of place, points or turns remaining. Night falls after nine turns.
[The Bait of the Hillock] In the west of the board, beyond the Asten Brook, lies a rise called Hillock. It carries no victory points. While the English hold it, the number of pieces they may move at once rises from 6 to 9; that is all. With a basic limit of only 6 for 18 pieces, this matters a great deal: it is because the limit is too small that the gaps in the wall cannot be filled. But taking it means coming down from the hill and crossing the brook, and on the far side there is neither shield wall nor doubling at the edge. In history, the fyrd who came down in pursuit of the fleeing Bretons made a stand on this rise, and were surrounded and cut down by horsemen who had turned back. William saw this, and twice afterwards fell back on purpose. The bait is visible to both sides. It is visible, and still, every turn, one hesitates.
[Commanders] The Normans: William II. His half-brothers Odo, Bishop of Bayeux, and Robert, Count of Mortain. On the right, Eustace II, Count of Boulogne, and William fitzOsbern. Robert de Beaumont, in his first battle that day, on the right. Count Alan, leading the Bretons on the left. Aimeri de Thouars of Poitou. Turstin fitzRou, who bore the papal banner. William Malet, to whom Harold's body is said to have been entrusted after the battle. Raoul de Tosny, Hugh de Grandmesnil and Hugh de Montfort. Walter Giffard, William de Warenne and William d'Evreux, who almost certainly served, are combined into divisions because of the number of pieces. The minstrel Taillefer, said to have gone ahead of the army tossing his sword in the air, and Roger de Montgomery, whose presence is disputed in the sources, are not on the board.
The English: Harold II. His brothers Gyrth (Earl of East Anglia) and Leofwine, both of whom fell that day. Aelfwig, Abbot of New Minster, Harold's uncle, who came with twelve monks wearing mail beneath their habits and twenty men-at-arms, and died there. The rest are the standing housecarls, the local thegns, and the fyrd raised shire by shire. Remarkably few names survive among the English who fought. We know the name of Breme, a freeman of Suffolk, only because a land survey twenty years later records in a single line that he "died in the battle against King William". The northern earls, Edwin and Morcar, beaten at Fulford, did not reach the south in time. Had they arrived, this ridge would have been longer.
[What these nine hours decide] William: wearing the wall down with archers (range 2) is safe but slow. Striking with horse (movement 5) is fast, but in front of the wall it means attacking doubled strength. The marshy ground at the foot of the hill halts the horse. With 8 moves, he cannot wear down and press at the same time. Harold: the ridge is ten hexes long, and he has 18 pieces. If every piece is set on the wall, Caldbec Hill and Malfosse behind it lie empty, and horse with movement 5 will go round to them. To pursue, or not to pursue. Pursuit gains moves, and with those moves he opens the very gap he ought to be filling.
[Outcome] Before nightfall, Gyrth and Leofwine fell, and last of all Harold. It is said that he was struck in the eye by an arrow, or cut down by knights. The English held their ground until dark, and then broke. Some of the Norman horse who pursued them fell into a hollow behind the ridge, the Malfosse, the "evil ditch", and died there. Harold's body could not be recognised, and it is said that his former wife, Edith Swanneck, was sent for. William was crowned at Westminster that Christmas, and twenty years later had a survey made that counted every piece of land in the island. An abbey was built on the hill, with its high altar placed where the Standard had stood. The name of the house of Godwin vanished from the survey, and nearly every entry for the holders of the land was rewritten with names from across the sea.
Until nightfall, the wall faced south.
Those who came down were surrounded, one after another, west of the brook.
Two brothers fell, and then the king.
Here King Harold was killed, the victors stitched in thread.
An abbey rose on the hill, its altar where the Standard stood.
Twenty more years, until every name among the holders of this island's land was rewritten.
The two weeks of manoeuvre after the landing, the night march of the 13th, and the pursuit after the battle are omitted. The board covers only the nine hours from nine in the morning until sunset. The three Norman stages of "shoot, press, strike" are represented by the placement and range of the pieces; the three assaults are not assigned to particular turns. Both armies are given the midpoint of recent estimates, seven to eight thousand men each, and are set nearly equal (1.04 to 1 in both men and CS: Normans 78, English 75; no extra weight has been given for quality, and the asymmetry of this board is written instead into the shield wall, the opening margin and the range of the pieces). * The shire names of the fyrd and the positions of some commanders include inferences from the practice of raising troops at the time.
1 hex = 100 m, 1 turn = 60 minutes, 1 CS = about 100 men. T1 = 14 October 09:00 (the battle opens), T5 = 13:00, T9 = 17:00 (sunset and the end). The Normans may move 8 pieces at a time and the English 6 (9 if they take the Hillock).
Maps
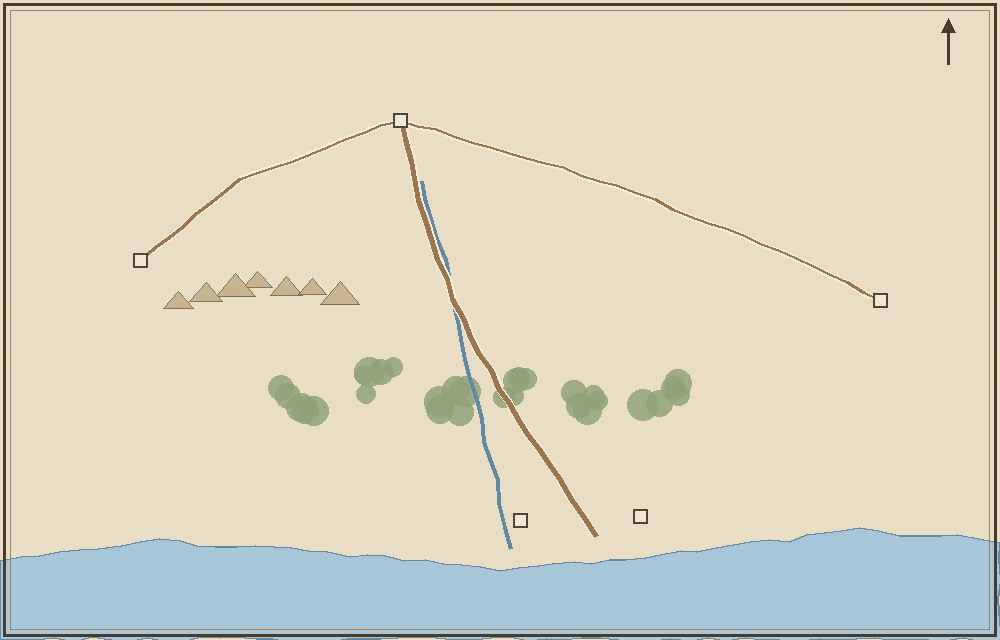 HASTINGS
London
Dover
Pevensey
Hastings
Winchester
The Weald
The Channel
to Normandy
to York / Stamford Bridge
HASTINGS
London
Dover
Pevensey
Hastings
Winchester
The Weald
The Channel
to Normandy
to York / Stamford Bridge
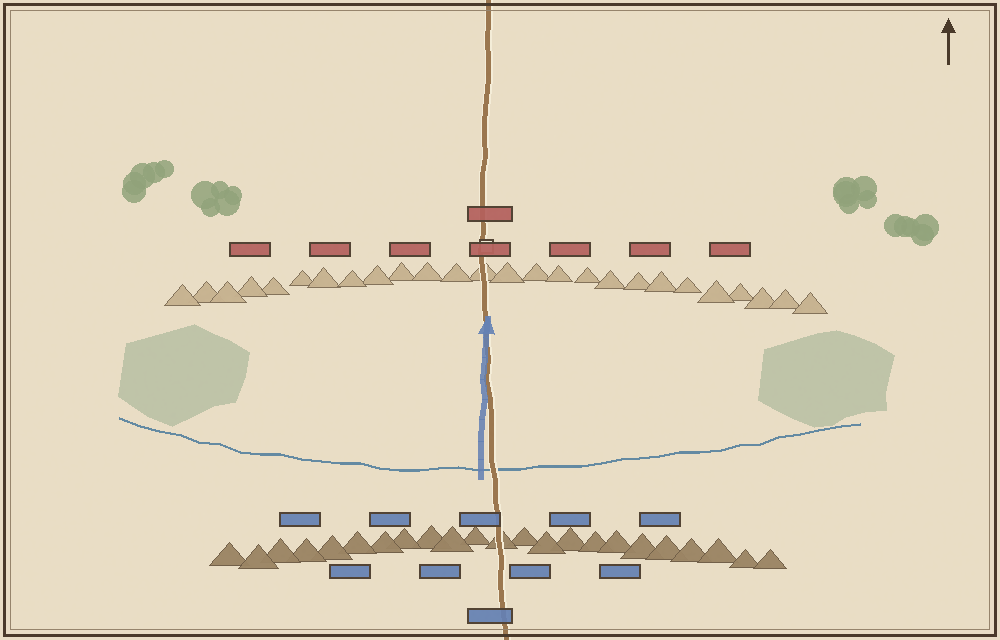 Senlac ridge / shield wall
Harolds standard
Norman army
marsh
marsh
Asten brook
to London
Senlac ridge / shield wall
Harolds standard
Norman army
marsh
marsh
Asten brook
to London